
Software Installation / Backup
Play it Safe: Backup 'before' you begin.
Normally this is very simple and nothing can go wrong, but as Forest Gump said, "Shit Happens".
Play it safe. After installing the software, you should backup up your original data before you porceed with programing your radio.
DISCLAIMER
I am not the author of the software program that I recommend here, nor am I an expert in programming software. The software and procedure I describe here were used successfully to program several Baofeng and Wouxon Radios, but . . . USE AT YOUR OWN RISK!
INSTALLING THE CABLE DRIVER SOFTWARE
(USB-to-Serial Bridge):
If you have the CD, installing the driver software for the cable is very simple.
The CD contains drivers for Win98/2K, Vista, and WIN7. Mine did not come with WIN8 drivers.
I had a look at the Vista and the WIN7 files. Both have a PDF instruction set and a Setup application. You might want to print the PDF, then simply follow directions and run the setup.
Here is what the WIN-7 Driver Software looks like:
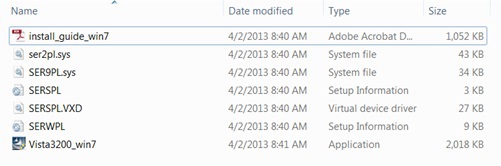
Do not let the name "Vista3200_win7" confuse you. This is the correct driver for WIN-7.
After you have installed the driver software, and plugged in the cable, it should recognize the cable when you plug it in, and automatically install the drivers. This will take about one minute to complete. BE PATIENT!
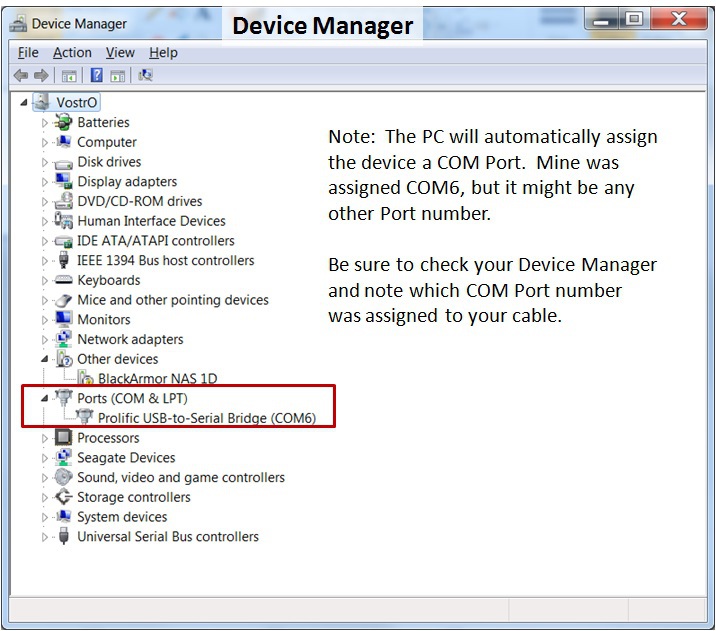
CHECK TO BE SURE THE CABLE/DRIVER IS INSTALLED AND WORKING CORRECTLY:
Do this by checking in the computer's DEVICE MANAGER.
Now remove the USB plug from the PC.
This part of the work is finished.
CONNECTING THE RADIO TO THE COMPUTER
- Turn the Radio OFF.
- Make sure the cable is not plugged into the Computer.
- Open the plastic/rubber lid protecting the Radio's MIC and Headphone Jack.
- Plug the cable into the Radio.
- Plug the cable into the Computer and wait one minute for the cable to initialize and be recongnized by the Computer.
- Turn ON the Radio.
The Radio is now connected to the Computer.
INSTALLING THE PROGRAMMING SOFTWARE
THE FOLLOWING EXAMPLE IS BASED ON THE ASSUMPTION
THAT YOUR ARE PROGRAMMING WITH "CHIRP" SOFTWARE.
If you did not download the CHIRP software during STEP 1, please do that now:
DOWNLOAD: FREE CHIRP SOFTWARE
It should look like this:

Install the software by double-clicking on the installer program, and following the directions.
After installing the software, RUN the software.
Once it starts, it looks like this:
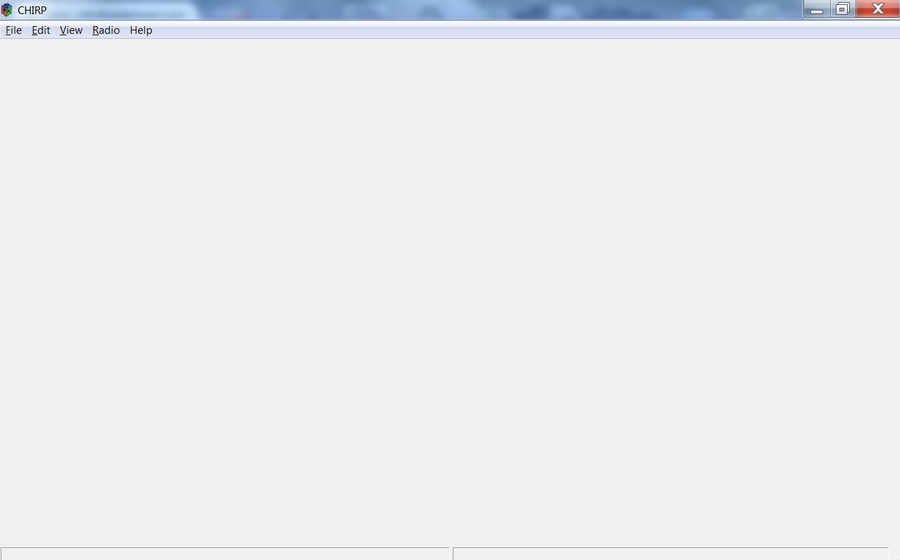
Not very exciting, is it? Don't worry, that's all you will see, initially.
- Now connect the cable to the radio (Baeofeng, Wouxon, etc.), by plugging its plug into the MIC and Headphone jacks.
- Next, connect the USB end of the cable to your PC. Allow about one minute for your PC to load the driver.
- Turn on your radio.
The first thing we want to do is to define the radio.
- Click on "Radio" in the menu at the top left; a small window opens showing several options; choose "Download From Radio."
- The next tiny window opens, Showing the Port and the first supported radio (in alphabetical order). In my case it was an Alinco DJ175.
- (note, in the picture below it now shows COM8 (was COM6); that's because I am running the screen shots on a different PC.
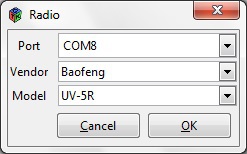
- The tiny window looks like this:
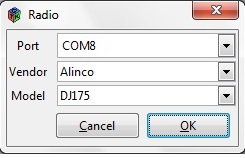
Normally the COM port will be selected automatically.
Now choose your radio "Vendor" and "Model".
In my case it will be Baofeng UV-5R.
Then click "OK."
The next window is a warning window asking if you wish to proceed with an experimental driver.
I did not bother to screenshot this window.
Just Click "YES".
The next window gives you instructions to turn off the radio and connect the cable.
Again no screen shot because it is just text.
At this point the radio is probably already connected.
If not, follow the instructions.
Then click "OK".
The final wndow tells you that the Cloning is in Process:
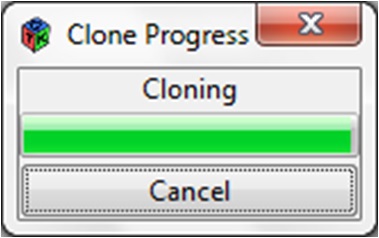
When the cloning process completes, a full screen will open up showing you the channel contents of your radio:
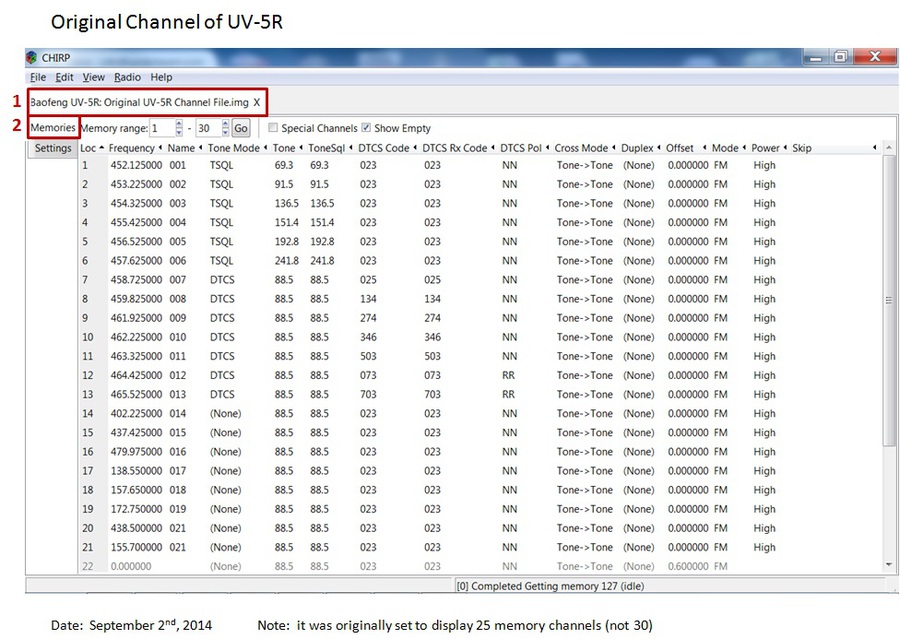
Note the file name near the top left of the screen (1). It is currently untitled.
Below that at (2) it tells you that these are the contents of the channels that are currently stored in memory.
My radio came programmed with these channels. I have no idea what they are.
Never-the-less, I made a backup of the original state.
CREATE A BACKUP OF THE ORIGINAL CHANNELS:
You have 3 options; pick whichever you prefer.
Option 1: Burn to CD
Click "File", in the top left hand corner.
Click "Save As"
Assign a file a unique name, such as "Original Channels"
Click "Save"
NOTE: It will save as a ".img" file and will ask you to burn it to a CD.
Option 2: Save as CSV file (my personal preference)
Click "File", in the top left hand corner.
Click "Export"
Assign a unique file name, such as "Original Channels"
Carefully choose a location to store the file in (and remember where it is).
Click "Save"
A new small window opens, entitled "Export to File". Click OK.
Option 3: Just make a Screen Shot of the Data.
(the picture above was a screen shot).
------------------------------------------------------------
This completes the software installation.

N E W

A Short Video by W8JI
N E W
OCFD ANTENNA
PRESENTATION


( Info-Only; NO SALES! )
Spiderbeam on Facebook:


BRAND NEW
from Spiderbeam:

Mini "SOTA" Pole
by Rob Sherwood NC0B

(AUF DEUTSCH)


Spiderbeam FG Pole

Photo: Nischal Nethrananda

A fun film about
Ham Radio Outdoors
(not just in Tenerife)
(English & German)


(nearly) Invisible Pole

An Aerial-51
Sponsored Expedition:
INTRODUCING
Special purpose Aerials:

Ultra-Lightweight antennas for expeditions and stealth applications.
+
(other)
---------------------
UPDATES:
|
|
-----------------
LL-TUNER "S-MATCH"
added to my
symmetrical tuner page.
----------------------
PROGRESSING:
LOTS OF NEW CONTENT IN THE SECTION:


Since JAN-2013
*******************