
Rotor Solutions for Spiderbeam
THIS PAGE SHOWS SOME TYPICAL INSTALLATIONS BY SPIDERBEAM USERS.
Note: The solutions shown here are those of the individual owners.
It should not be implied that Spiderbeam can help you with
the implementation of the solutions shown here.
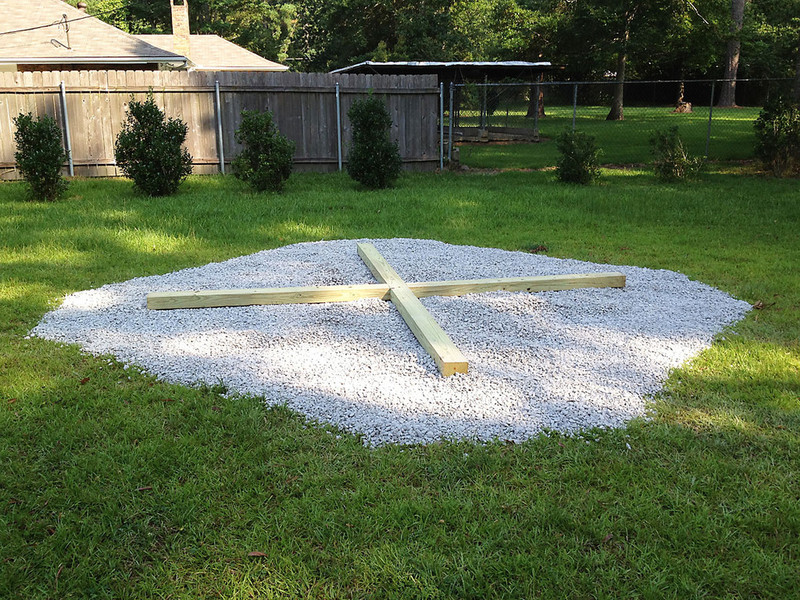
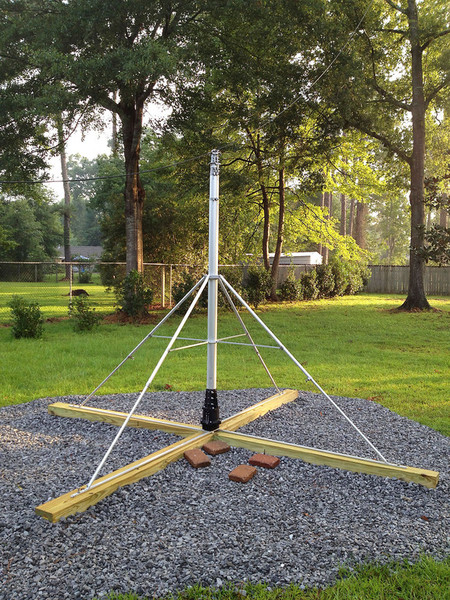
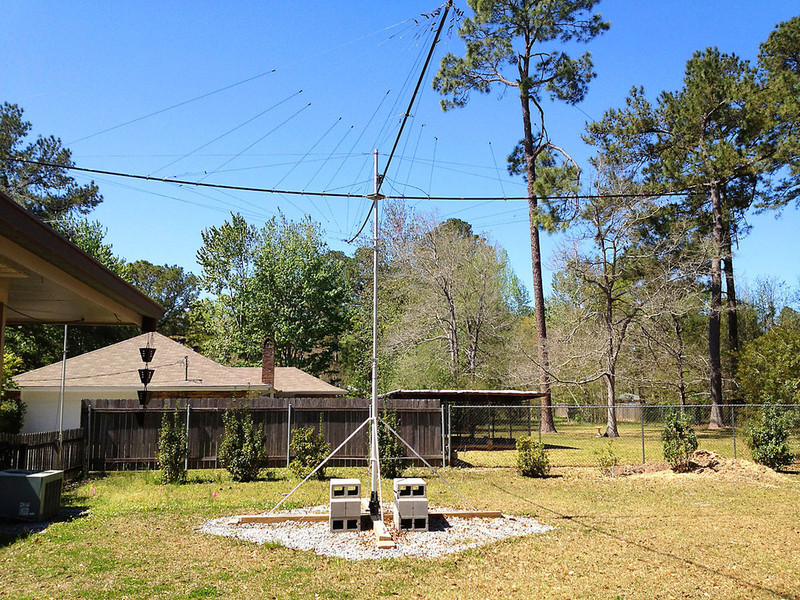
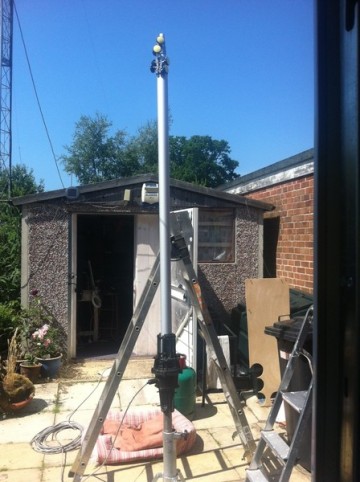
1) by Parker Dinkins, W5ADD

Explanation of Pictures:
01 - Two cell cured 4x6 lumber pieces (notched) on limestone bed. Landscape cloth underneath.
02 - Rotor bolted in place, on ground struts with Quadpod. Quadpod ends not permanently bolted yet.
03 - Mast in place. Note pavers, to be used at ends of 4x6s for leverage with wrecking bar. Ends of 4x6s will be raised slightly, and limestone kicked underneath the 4x6s to adjust mast exactly in column.
04 - Spiderbeam on completed assembly (Shown above). The CMU (blocks) are a very solid base for a short ladder, which makes raising and lower the mast much easier. The pavers are still at the ends of each 4x6, where they were used with wrecking bar to adjust mast exactly into column.
Additional Pictures, by Parker Dinkins, W5ADD:
(Pic. 01) (Pic. 02) (Pic. 03) (Pic. 04)
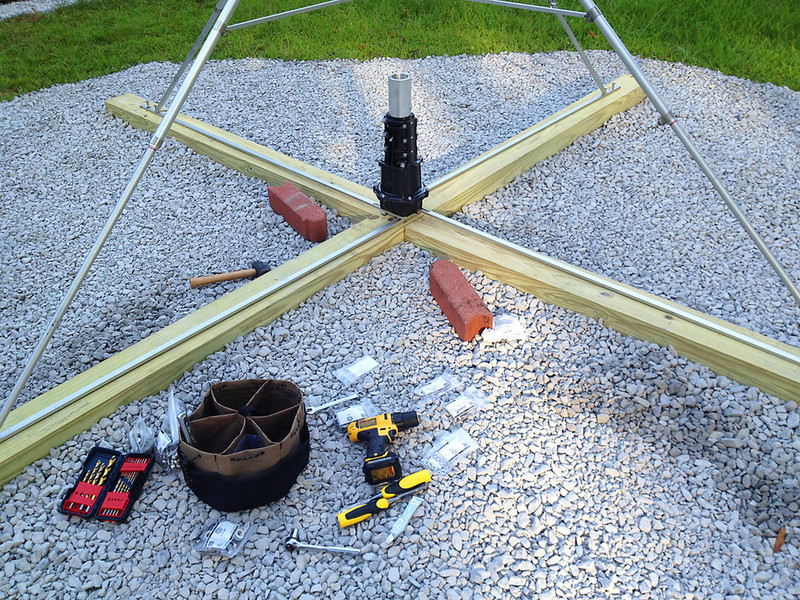
Note-1: Parker used a Yaesu G800 rotor. He says the G2800 also fits.
Note-2: The 4 aluminum struts that bolt to the rotor are available from Spiderbeam on special request; they are not shown in Spiderbeam's Web Shop.
2) Ken Chandler, MM3i
Ken (G0ORH) and his MM3i team used a Yaesu G800 rotator and self supporting 3 leg heavy duty tripod to rotate their Spiderbeam on Arran Island during their 2013 IOTA expedition.
The tripod had an adjustable screw at the top which locked the short stub mast and prevented from turning under torque. In the picture you can just make out the thumb wheel of that screw.
The antenna was a 5 band Spiderband on top of a 40 ft. mast.
The setup worked without a flaw.
3) Keep It Simple Stupid (KISS)

This SIMPLE, but effective rotor mount was sent to us in September of 2011.
Unfortunately I do not remember who sent it, but he did give us permission to use it.
Will the owner of this picture please send me an email and remind me who you are, so that I can give you credit for coming up with this simple method of mounting the rotor.
I don't know how long the wooden base will survive in inclimate weather but for the short term, this will do the trick.
This time the rotor appears to be a Hygain Ham II (or similar). The small screw in the mast just above the rotor is for securing the Spiderbeam Rotor Adapter inside of the mast.
Here's what it looks like in the winter with the antenna on it:

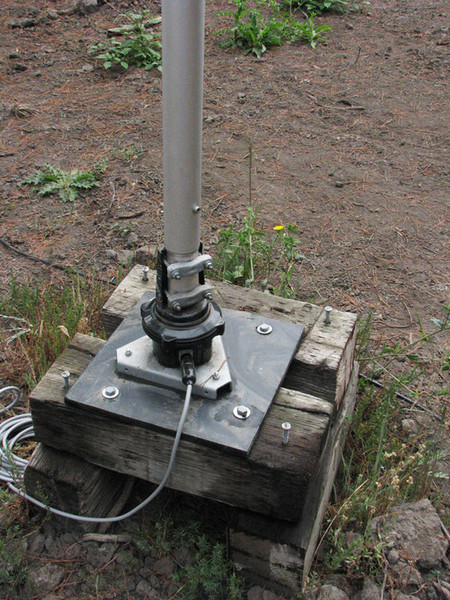
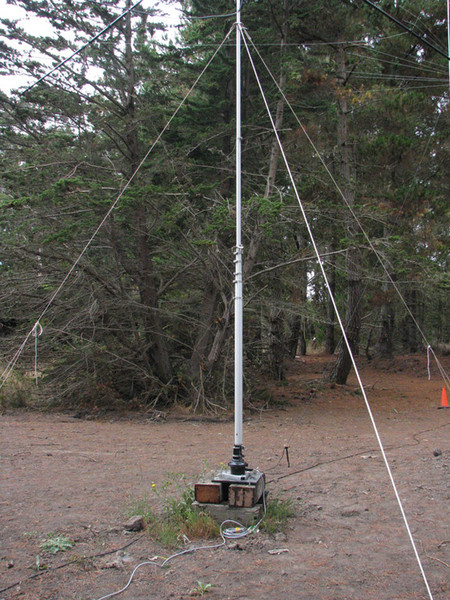
4) Paul Grigorieff, N1HEL

ANOTHER simple semi-permanent "D-i-Y"
base-mounted rotor installation:
While this structure can be moved across the ground (with difficulty), it is fairly massive and stable. This mounting option was chosen because Paul does not own the land, and must therefore be prepared to remove the antenna if necessary.
The mast is supported by three guy lines that run down to Spiderbeam 750mm ground stakes. Paul says these can only be extracted by use of heavy construction equipment. Paul shares the area with a landscaping company and has this equipment on site.
A second set of (lower) guy line tie points can be seen in the antenna image at the top of the smallest unextended section of mast. So far, the mast and antenna have been fairly stable at this height in winds up to about 45 mph.
Close-ups of the base and mast:
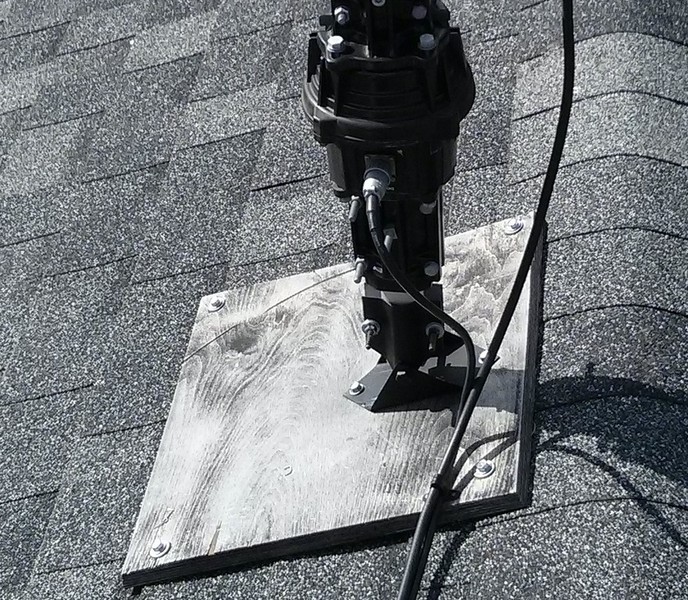
5. Brenton Crowhurst, VE6IE

Brenton's 10m Heavy Duty Spiderbeam Aluminum Mast is bolted to a Spiderbeam Rotor Adapter, and then to his Yaesu G-800 rotator.
The rotator is mounted to a Rohn telescoping mast roof mount.
The roof mount is bolted to a 3/4" plywood board, affixed to the roof.
This simple arrangement has been in place in the center of Benton's roof since early 2012, and has withstood some very strong Calgary winds!
Close-Up Pictures:
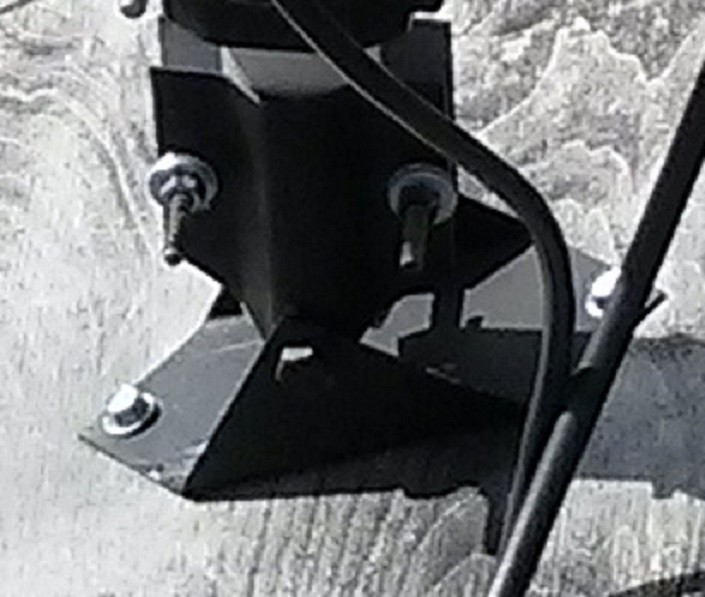
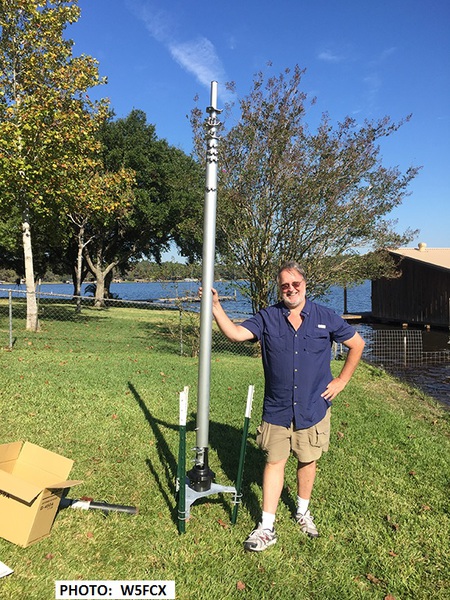
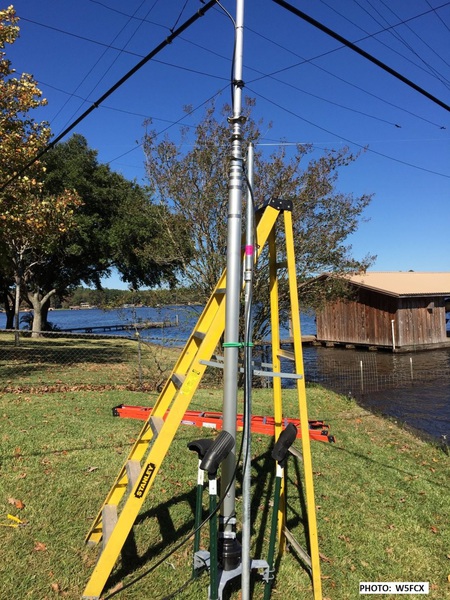
6. Rick Braddy W5FCX

Rick has taken a novel approach. In his solution, he uses the ROHN AS455G Rotor Plate to mount the rotor two. This is held in place with 3 low-cost T-Posts (fence posts).
For full information, please visit Rick's web page: W5FCX WEB
Photo Gallery:


N E W

A Short Video by W8JI
N E W
OCFD ANTENNA
PRESENTATION


( Info-Only; NO SALES! )
Spiderbeam on Facebook:


BRAND NEW
from Spiderbeam:

Mini "SOTA" Pole
by Rob Sherwood NC0B

(AUF DEUTSCH)


Spiderbeam FG Pole

Photo: Nischal Nethrananda

A fun film about
Ham Radio Outdoors
(not just in Tenerife)
(English & German)

(nearly) Invisible Pole

An Aerial-51
Sponsored Expedition:
INTRODUCING
Special purpose Aerials:

Ultra-Lightweight antennas for expeditions and stealth applications.
+
(other)
---------------------
UPDATES:
|
|
-----------------
LL-TUNER "S-MATCH"
added to my
symmetrical tuner page.
----------------------
PROGRESSING:
LOTS OF NEW CONTENT IN THE SECTION:


Since JAN-2013
*******************