
PAINT MY POLE
(pimp my pole)
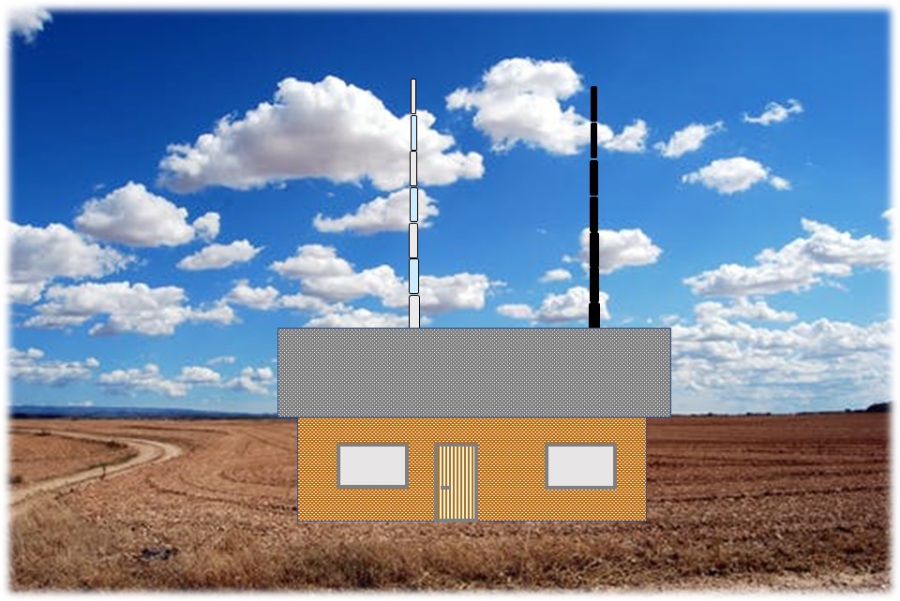
(nearly) Invisible Pole
If you alternate the color of the pole sections between light blue and light
grey, the pole becomes very stealthy.
See drawing on the right -->
Left: Stealth Pole Right: Standard Pole
And larger drawing below:

Painted-Pole Photo Gallery:
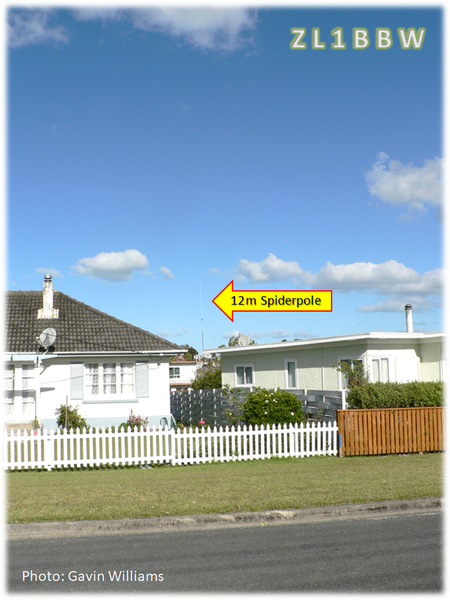
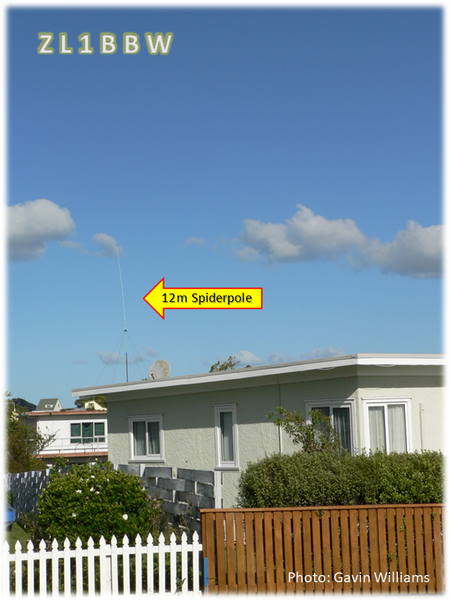

SPIDERPOLES ARE EASY TO RE-PAINT
ANY COLOR YOU LIKE
Perhaps my pole (pictured on the right) is a little more colorful than you like, but I think you get the idea. It can be any color you want it to be. Perhaps you also see why Spiderbeam does not let me design poles!
TYPE OF PAINT:
Almost any paint will do.
The best is to get a spray can of paint used for touching up the paint on cars.
You may also use Acrylic or Nitro based paints.
VERY IMPORTANT:
The bottom end of each pole segment has no paint on it. Its surface is also very rough compared to the rest of the surface on the segment.
DO NOT PAINT OVER THIS ROUGH PORTION OF THE POLE SEGMENT!
PREPARATION (Before painting):
- Clean the pole using water and a mild soap (such as dish washing soap)
- Rinse it thoroughly and allow to dry.
- Sand the area to be painted lightly with a very fine sand paper (or emory paper).
- Rince thoroughly and allow to dry completely.
- Wrap the rough surface with masking tape
If the pole has been outside for a really long time (many years) and has a really rough surface, it may need additional attention. In that case we suggest cleaning with Acetone or MEK and/or fine sand paper. After cleaning, follow the procedure above, washing with mild soap and water, etc.
PAINTING:
- Hold the pole segment by the taped portion with one hand and spray THIN coats of paing with the other hand.
- Apply 2 or 3 very thin coats of paint, rather than 1 or 2 thick coats
- Allow to dry between coats of paint
TIP:
To make holding the pole segment easier while painting them, run a thin rope (or nylon string) through the entire length of the pole segment and string it between two trees or two "anythings".
This will support the pole segment and you won't have to hold it while you are spraying. It also allows for easy drying without having to touch the outer surface of the pole.
MORE INFO:
We do not have exact data but here in Germany some of Spiderbeam’s 12m fiberglass poles have been in permanent use since 2004. So, the poles should last at least 10 years under these weather conditions.
The 18m/22m/26m fiberglass poles as well as the stackable tube segments (for Spiderbeam Yagi’s) are all made of the same material.
High UV radiation can accelerate aging. Fiberglass itself is not UV stable. For this reason, Spiderbeam fiberglass poles are first painted with a primer, and then painted with a thick black layer of paint, providing excellent UV protection.
For the harsh conditions, it might make sense to repaint the pole in a few years. This is best accomplished by disassembling the pole and painting the individual segments separately.
If it will be used permanently, and it is not important if the segments "stick together" due to the painting and possibly can no longer be retracted, you could paint the mast in one piece. Otherwise, you would have to paint the segments individually.
At the lower end of each segment, carefully tape the rough section (friction lock) with masking tape, so that it is not painted. Otherwise the friction-lock will not function properly.
It is best to paint it in the garage, but if you paint the whole pole at once, then it only works outside.
PREPARATION:
Before painting, first clean the pole’s surface with a light detergent (i.e., dish-washing soap in warm watter), then rinse and allowing to dry. Roughen the mast with fine sandpaper (e.g. 220 grit) and clean with a solvent (e.g. acetone or nitro thinner ... ATTENTION: follow safety instructions).
Rinse again; allow to dry.
Then spray with an exterior resistant spray paint (e.g. from the automotive sector). It is better to use two or three thin coats than one thick coat. Allow the layers to dry for a few hours in between painting (instructions are on the paint can). When painting, mild temperatures should prevail, preferably around 20°C.

N E W
OCFD ANTENNA
PRESENTATION


( Info-Only; NO SALES! )
Spiderbeam on Facebook:


BRAND NEW
from Spiderbeam:

Mini "SOTA" Pole
by Rob Sherwood NC0B

(AUF DEUTSCH)


Spiderbeam FG Pole

Photo: Nischal Nethrananda

A fun film about
Ham Radio Outdoors
(not just in Tenerife)
(English & German)


(nearly) Invisible Pole

An Aerial-51
Sponsored Expedition:
INTRODUCING
Special purpose Aerials:

Ultra-Lightweight antennas for expeditions and stealth applications.
+
(other)
---------------------
UPDATES:
|
|
-----------------
LL-TUNER "S-MATCH"
added to my
symmetrical tuner page.
----------------------
PROGRESSING:
LOTS OF NEW CONTENT IN THE SECTION:


Since JAN-2013
*******************