
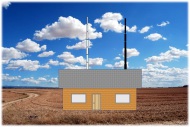
End-Fed Antenna Mounting
BEWARE OF AMERICAN TEXT BOOKS !
World War II IS OVER!
All US American text books, hand books, antenna books, etc., that I have seen are still showing antenna construction techniques that are 60 years or more old AND not compatible with modern lightweight antenna poles.
READ MORE ON THIS TOPIC
AT THE BOTTOM OF THIS PAGE.
GENERAL CONSIDERATIONS:
- Nothing should ever be attached to the very top of the pole except for the top of a wire of a wire vertical.
- This is because the the pole is too thin at the very top and does not support horizontal loads well at that point.
- NEVER USE A METAL CLAMP TO FASTEN THINGS TO THE POLE.
- Metal clamps easily damage the thin walls of the fiberglass tubes.
- All antenna types which have a wire near the top and running away from the pole should depart the pole at the joint of the top two pole segments.
- It is OK to bend the pole in temporary installations (1 or 2 days)
- Longer term and permanent installations should count-guy the pole at the point where the wire exits the pole. This will pull the pole into the [straight] vertical position again and prevent it from remaing bent when you take it down.
- Inverted-L antennas that require ground radials (i.e. quarter wavelength) should begin with the feedpoint about 10cm (4") above the
ground.
- This height is a precaution in case the base of the pole is under water in heavy rain.
- Inverted-L antennas that do not require ground radials (i.e., half wavelength End-FedZ such as Par Electronic/LNR Prec.) should NOT
have their feedpoint that close to ground.
- If you mount its feedpoint at ground level, ground losses increase significantly.
- Recommended Minimum Feedpoint Heights above ground:
- 10m by 25cm (10")
- 20m by 50cm (20")
- 40m by 1m (40")
- 80m by 2m (80")
- When possible, I double those numbers (i.e., 40m by 2m feedpoint height).
FASTENING:
As stated above, NEVER use metal clamps. Instead use wire ties or electrical tape. Electrical tape has the disadvantage that when left on the surface of the pole for a long time, especially in hot weather, it can remove the paint from the surface of the pole when you remove the tape.
TIP: for wire vertical antennas, tie a knot in the wire near its tip. This will prevent the wire from slipping back down through the tape or wire-tie.
The feedpoint box is attached simply by placing a wire tie above, fastening the radiator wire to the pole, and another wire-tie below it fastening the coax to the pole.
RUNNING WIRE DOWN THE POLE:
NOTE: WE STRONGLY ADVISE NOT TO TILT FULLY EXTENDED POLES FROM THE HORIZONTAL POSITION INTO THE VERTICAL POSITION.
This usually works OK for the naked pole but when wires, coax and rope are attache, it is very likely that you will break the pole.
INSTEAD: Mount the pole by strapping it to a fence post, tree, wooden stake, or galvanized angle-iron, then telescope the individual segments up, one at a time.
Wire running down the pole should not be run in a straight line. Instead it should be spiraled around the pole about one turn per meter (3'). This helps keep the wire tight against the pole, reduces flapping in the wind and also helps keep the weight load balanced around the pole.
For Vertical Antennas:
Simply fasten the top of the wire to the tip of the pole and then twist/rotate the pole as you telescope the individual pole segments upwards.
For Inverted-L Antennas:
This is not quite so easy. Again, start by fastening the tip of the wire to the pole, then as you telescope the individual pole segments upwards, wrap the wire (with feedpoint box) around the pole about 1 turn every meter (3').
Tip: this is easier to do with the coax not connected to the feedpoint.
BEWARE OF AMERICAN TEXT BOOKS !
World War II IS OVER!
All US American text books, hand books, antenna books, etc., that I have seen are still showing antenna construction techniques that are 60 years or more old AND not compatible with modern lightweight antenna poles.
SPECIFICALLY: they almost all show the use of #12 AWG copper wire and huge porcelain insulators - and suggest using RG-213. The weight of this material spells disaster for a lightweight telescoping fiberglass pole.
INSTEAD: Use special lightweight yet heavy duty wire such as WIREMAN CQ-534 (insulated, stranded, #26 AWG Copper-Weld) or PolyStealth-26 (similar to CQ-534) for your low power (100w or less) portable operations.
AND: Much thinner coax, such as RG-58 for low power, or LMR-240, Aircell5, or Airborne-5 for higher power applications. For low power (up to 100w), it is OK to run RG-174 up the pole, but then keep it only as long as the pole and extend to shack with thicker coax.
For permanent and higher power installations, use WIREMAN CQ-532 (insulated, stranded, #18 AWG Copper-Weld). This will be fine for 80m and higher bands. For 160m, "theoretically" Copper-Weld is not the best choice because the RF penetrates deeper inside of the wire, into the steel. Regardless, Spiderbeam's 160m vertical kit uses CQ-532 and all of the dozens of users have given positive feedback.
INSULATORS: Use as lightweight as you possibly can, especially for low power applications.
ROPE: Use thin, lightweight but strong rope, such as [Dacron-coated] Kevlar, or Dyneema. Spiderbeam recommends its 2mm Kevlar rope for guying all of its fiberglass poles. Extension of the thin horizontal wire segment of Inverted-L antennas can be done with 1mm Kevlar rope.
REMEMBER: The lighter your antenna is, the higher up the pole you will be able to mount it. The higher a horizontal antenna is, the better the performance.

N E W

A Short Video by W8JI
N E W
OCFD ANTENNA
PRESENTATION


( Info-Only; NO SALES! )
Spiderbeam on Facebook:


BRAND NEW
from Spiderbeam:

Mini "SOTA" Pole
by Rob Sherwood NC0B

(AUF DEUTSCH)


Spiderbeam FG Pole

Photo: Nischal Nethrananda

A fun film about
Ham Radio Outdoors
(not just in Tenerife)
(English & German)

(nearly) Invisible Pole

An Aerial-51
Sponsored Expedition:
INTRODUCING
Special purpose Aerials:

Ultra-Lightweight antennas for expeditions and stealth applications.
+
(other)
---------------------
UPDATES:
|
|
-----------------
LL-TUNER "S-MATCH"
added to my
symmetrical tuner page.
----------------------
PROGRESSING:
LOTS OF NEW CONTENT IN THE SECTION:


Since JAN-2013
*******************