
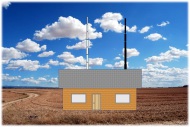
GUY ROPES & GUYING SPIDERPOLES
Except for the 12m fiberglass pole,
ALL Spiderbeam Spiderpoles
must be guyed all the time.
(Note: tips for working with Kevlar guy rope are at the bottom of the page.)
KNOWING HOW TO PROPERLY GUY THE POLES IS VERY IMPORTANT
FOR RELIABLE INSTALLATIONS OF SPIDERPOLES.
Normally the pole (with nothing attached to it and no wind blowing) will stand straight as an arrow, even without guying. However without guying, especially the longer poles will bend significantly with just a tiny bit of wind. Therefore it important to always guy the poles!
The primary purpose of guying is to limit the amount of travel the pole has in strong winds. It is not necessary to pull the guy ropes as tight as you can. They need only be "snug" (just barely tight), and may even have a little bit of slack (droop) in them.
PERSONAL NOTE: I always guy the 12m pole in permanent installations, but for short excursions (i.e. day trips), I usually do not bother unless there is a lot of wind, or I use an antenna which exerts a lot of force on the pole. I always guy all other poles, all the time.
READ ME FIRST:
The following instructions explain how to guy the spiderpole (only) without any wires or antenna on it, or when just a thin vertical wire is on the pole for use as a wire vertical.
When you attach other types of antennas, especially those applying a horizontal force to the pole, you may need additional guying.
Additional guying should be chosen on a case-by-cas basis to counter the horizontal force (pull) applied by the antenna or other payload, to the pole.
For guy rope lengths and height of attachment, see Download (below).
STANDARD GUYING INSTRUCTIONS
Important Guying Considerations:
- Choice of Rope
- Number of Guy Directions
- Height of Guy Point(s) on the Pole
- Guy Rope Tension
Choice of Rope:
Spiderbeam recommends its own 2mm Kevlar rope for ALL standard guying requirements including the standard "top guy rope."
Spiderbeam also sells 1mm Kevlar rope and states it is for "top guy ropes" but it is referring to cases where guying above the standard top guy level is required. Specifically, in cases of top loaded verticals, where very thin (26-AWG) wires are used for capacity hat wires, these thin wires are to be extended with the 1mm Kevlar. Weight is every important when guying at that height.
Normally the 1mm Kevlar rope is not recommended for guying.
WARNING: Often we see people guying with much thicker rope. This is very dangerous and can sometimes lead to breaking of the pole during snow or ice storms.
Number of Guy Directions:
This is easy. The recomended number of directions is FOUR (4) - NOT three.
If you are very careful with the placement of guy ropes and place them exactly 120 degrees apart, you can usually get away with guying in just 3 directions, at least for the shorter poles, but 4 directions is always safer.
Heigth of Guy Point(s) on the Pole:
This is different for each pole model. See drawings and details in the Download document below.
Guy Rope Tension:
Guy ropes should be slightly loose; you should be able to see a tiny bit of sag in each rope when it is adjusted properly.
One of the biggest mistakes people make is tying guy ropes too tight. This often bends the pole in one direction. If left like that for an expended period of time (i.e. several months), this can permanently bend the pole.
DO NOT OVER-TIGHTEN THE GUY ROPES.
THE BOTTOM LINE ON GUYING:
It is impossible to define one rule for guying poles that works in all cases.
Weather conditions and wind behavior vary too much from one location to another.
And, antennas can be very different from one to another. Some are light, others are heavy. Some are VERY HEAVY.
If you build a dipole of any kind, following the very antiquated directions in the "ARRL HANDBOOK", and then hang it on a fiberglass pole, you are asking for trouble.
If you buy an antenna, built like this, and try to hang it on a fiberglass pole, you are asking for trouble.
The pictures, drawings and directions shown in the HANDBOOK are the still the same as the ones I studied in my 1958 HANDBOOK when preparing for my license.
In the meantime, nearly everything has changed:
- We did not use fiberglass poles for antenna supports in 1958. We had heavy steel masts, later slightly lighter aluminum poles.
- We did not have modern material such as plastics, teflon, epoxy, etc.
- Ropes were thick and heavy if they were to be strong. Today we have Kevlar, Dyneema, Dacron, PFDF Monofil, etc.
So, whether or not YOUR pole must be guyed
depends on where you live, and what you attach to it.
To be on the safe side, follow Spiderbeam's recommended guide lines for guying:
DOWNLOADS:
This one document illustrates how to properly guy the Spiderpoles.
GUYING SPIDERPOLES.pdf
PDF-Dokument [204.6 KB]
When discussing guying with other people, it is important both persons mean the same thing when they refer to an attribute of guying. This document will help.
Guy Rope Definitions.pdf
PDF-Dokument [138.6 KB]
This document shows you how to prepare the tips of Kevlar guy rope so that it does not fray and that it can be inserted in the 3mm hole of the Spiderbeam insulators.
Working with Kevlar Guy Rope.pdf
PDF-Dokument [404.7 KB]

N E W

A Short Video by W8JI
N E W
OCFD ANTENNA
PRESENTATION


( Info-Only; NO SALES! )
Spiderbeam on Facebook:


BRAND NEW
from Spiderbeam:

Mini "SOTA" Pole
by Rob Sherwood NC0B

(AUF DEUTSCH)


Spiderbeam FG Pole

Photo: Nischal Nethrananda

A fun film about
Ham Radio Outdoors
(not just in Tenerife)
(English & German)

(nearly) Invisible Pole

An Aerial-51
Sponsored Expedition:
INTRODUCING
Special purpose Aerials:

Ultra-Lightweight antennas for expeditions and stealth applications.
+
(other)
---------------------
UPDATES:
|
|
-----------------
LL-TUNER "S-MATCH"
added to my
symmetrical tuner page.
----------------------
PROGRESSING:
LOTS OF NEW CONTENT IN THE SECTION:


Since JAN-2013
*******************