
Mount for Fiberglass Telescoping Pole
( The Portable Wheel-Base-Mount is on the 2nd half of this page, below. )

KEEP IT SIMPLE (and SAFE)
ALWAYS "strap" the pole to its support.
NEVER "clamp" it to anything.
If you are using a Spiderbeam telescoping fiberglass pole to support a horizontal antenna, here is a quick and simple way to securely mount it anywhere in your yard.
Even though you are planning to guy the pole, which also holds it in place, you will find that by strapping the bottom segment to a stake BEFORE your raise it, it will be much easier to raise, especially if you are working alone.
However, care must be taken to avoid 'point-pressure' on the thin wall of the pole. This is accomplished by using a small strap or a short piece of thick (soft) rope.
Also, if the base is strapped to a stake, you can use both hands for fastening guy lines at any point, and you can pause your work at any time (i.e. to answer the mobile phone, which always rings when you have both hands busy...etc.).
Some people suggest simply slipping the pole over a stake in the ground. This is not a good idea. When doing that, you have to hold the pole while raising over it the ground stake and then slip it over the stake once it is raised. If you need to attach wires or ropes at any point, you will have a hard time holding the pole and working with just one hand.
Start with a piece of angle iron (or wooden stake):
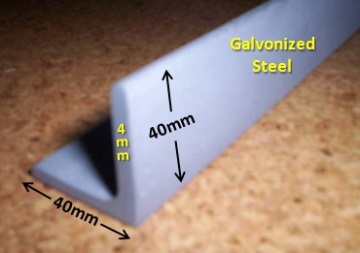
- For 12m Pole: 1.20m to 1.50m long
- For 18m Pole: 1.50m to 2.00m long
INSTALLATION:
- Locate the exact place the pole is to be installed.
- If the ground is hard, run water (gently) from a garden hose at that point for about 15 minutes.
- Using a "Fence Post Driver", hammer the angle iron about 75cm into the ground, taking care to keep it perfectly straight.
- Note: if you do not have a fence post driver, use a sledge hammer, but then you really must take care to drive it straight into the ground
Fence
Post
Driver
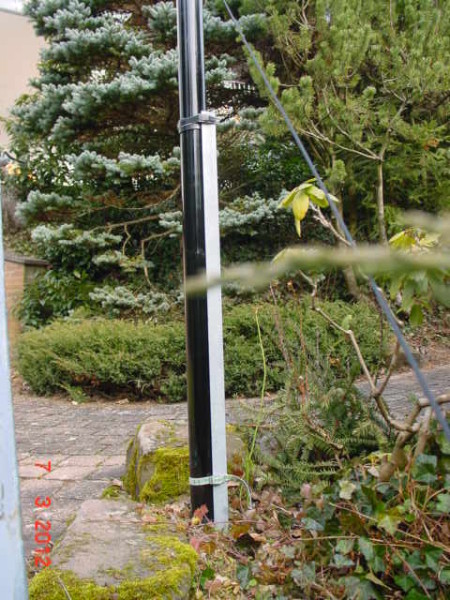
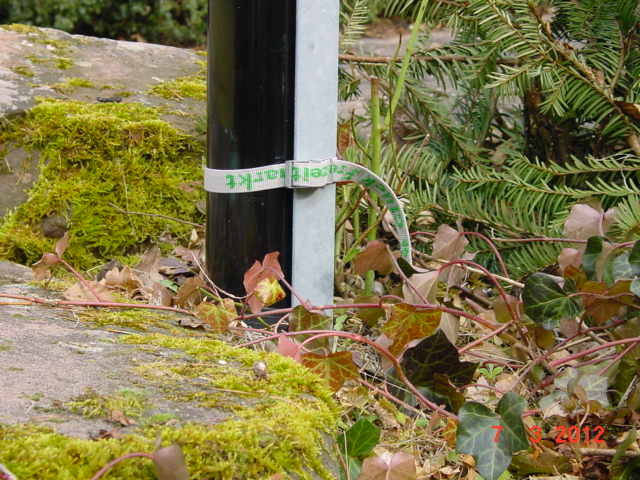
Do not place the pole directly against the angle iron.
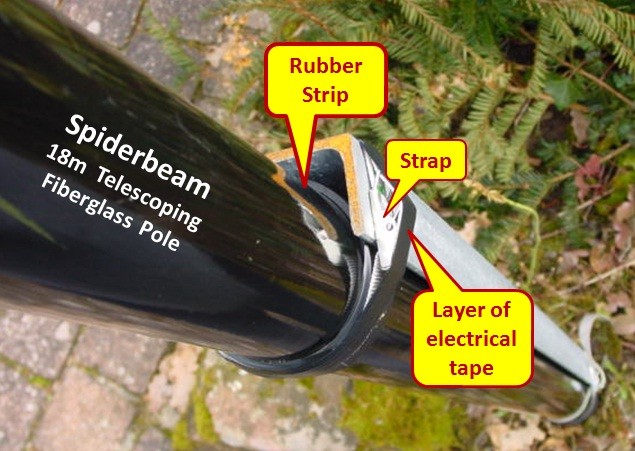
You will secure the Spiderbeam pole to the angle iron using 2 or 3 small straps, available in camping supplies shops. If you do not have any straps available, use short stubs of thick dacron rope. Do not use nylon rope for perminant installations, as it deteriorates in ultraviolet rays.
Each place you intend to place a strap, you should wrap the pole with one layer of rubber strip and secure it with a layer of insulation tape. This prevents the metal angle iron from damaging the surface of the pole. Use the same type of rubber strip as used with the the Spiderbeam clamp sets, or anything similar. If nothing else is available, cut a piece of bicycle innertube and wrap it around the pole. Or, simply wrap the pole with a large cable-tie.
If you leave the bottom rubber cap on the pole, you do not need extra rubber insulation for the bottom strap.
Here are some pictures of the base mount for my Spiderbeam 18m fiberglass pole:
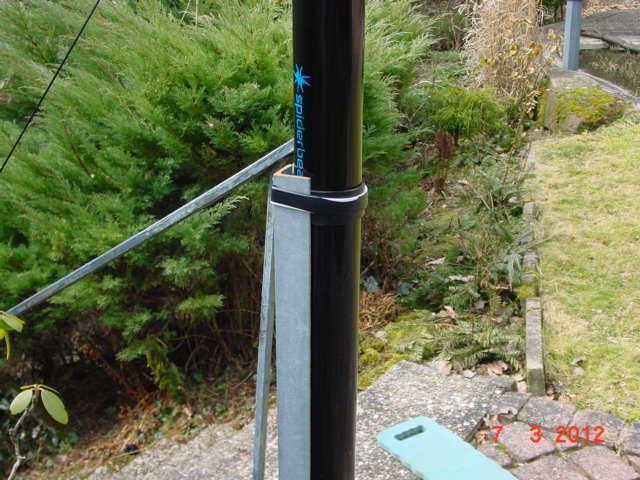

Once the bottom segment of the pole is secured to the angle iron, it is very easy for one person to raise the remaining pole segments alone.
Tip: loosen the straps just a little so that you can rotate the pole easily within the straps. This makes it easier to apply the twisting pressure for the segment-to-segment friction lock.
Do not forget to re-tighten the straps once the pole is fully extended.
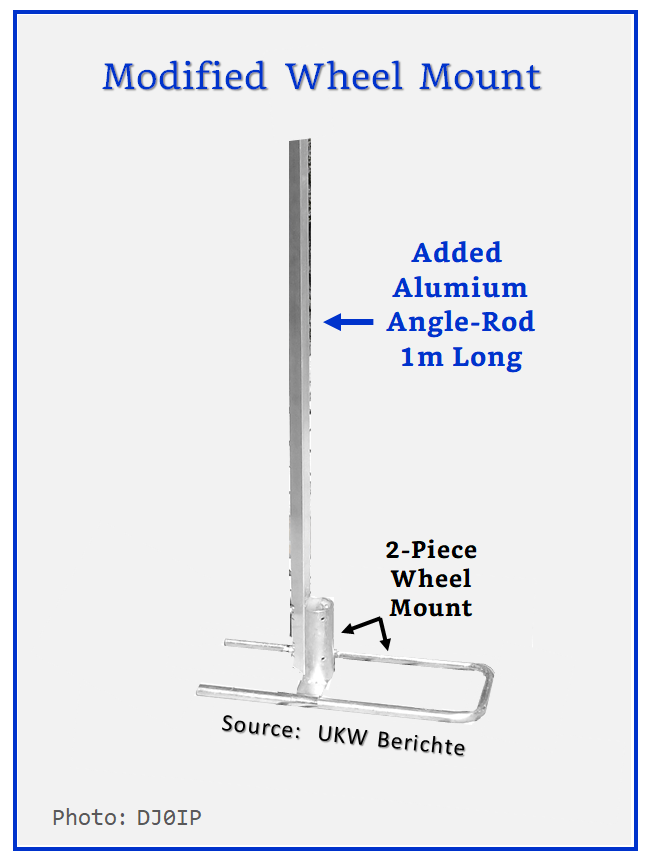
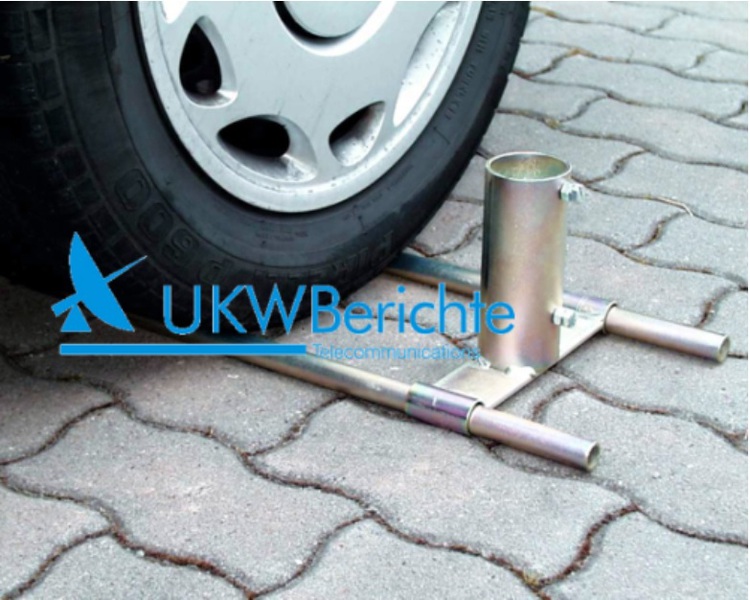
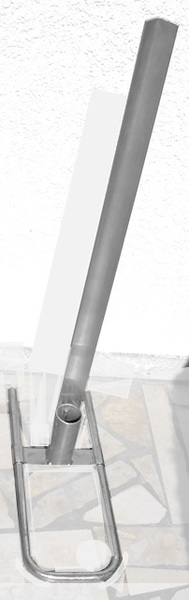
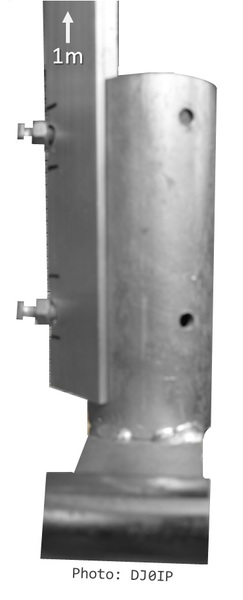
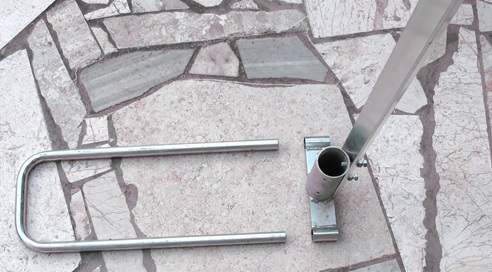
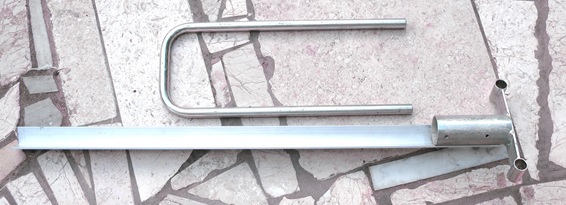
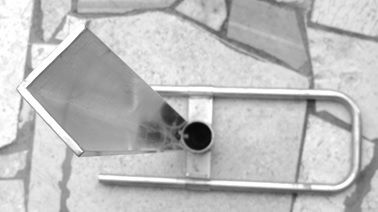
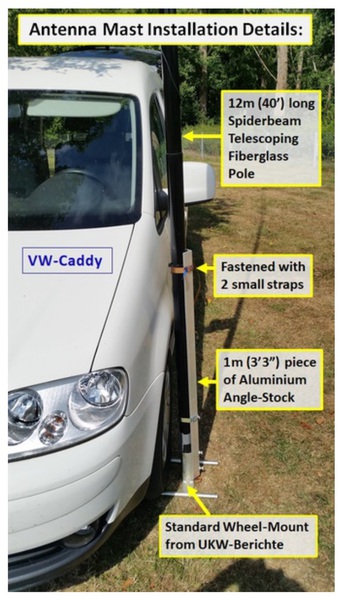
Wheel-Mount for Spiderpoles
The picture on the right shows a modified commercial wheel-mount from UKW Berichte.
Important: A 1 meter long aluminum angle-rod is bolted to the steel tube of the wheel-mount. The base cap of the Spiderpole sits on top of the steel pipe, the Spiderpole is then strapped to the angle-rod with two straps.
There are more photos in the gallery below.

N E W

A Short Video by W8JI
N E W
OCFD ANTENNA
PRESENTATION


( Info-Only; NO SALES! )
Spiderbeam on Facebook:


BRAND NEW
from Spiderbeam:

Mini "SOTA" Pole
by Rob Sherwood NC0B

(AUF DEUTSCH)


Spiderbeam FG Pole

Photo: Nischal Nethrananda

A fun film about
Ham Radio Outdoors
(not just in Tenerife)
(English & German)

(nearly) Invisible Pole

An Aerial-51
Sponsored Expedition:
INTRODUCING
Special purpose Aerials:

Ultra-Lightweight antennas for expeditions and stealth applications.
+
(other)
---------------------
UPDATES:
|
|
-----------------
LL-TUNER "S-MATCH"
added to my
symmetrical tuner page.
----------------------
PROGRESSING:
LOTS OF NEW CONTENT IN THE SECTION:


Since JAN-2013
*******************